
💡New to runs? Read Runs and Run Sheet Overview first to understand the run-based data structure.
To create or edit a layout:
- Navigate to Templates → Run Sheet Layouts
- Select Add new RunSheet Style
The Run Sheet Editing Page opens, where you can configure your layout.
Create a Run Sheet Layout
Enter a unique name for your layout in the Name field.
Use a descriptive name that helps you identify its intended use. You can include the engineer's name or car model, followed by a version number.
Examples
Configure Lap Flag Labels
Expand the Lap Flag Labels section below the Name field.
The section contains 18 lap types, each with its own name field. Enter the abbreviations you want to use for each lap type.
For example:
QUALI Lap: Q, SAFETYCAR Lap: SC, INSTALL Lap: INST
⚠️ Configure the lap flag labels to ensure ONE RACEHUB's fuel/energy calculations work correctly.
Add blocks to your layout
Use the Add Blocks section to select the components you want to display on your Run Sheet.
💡Start with the blocks your team uses most. Add specialized blocks as needed.
Legacy blocks
The following blocks appear in existing layouts but are not recommended for new layouts:
- Blanking, Lap Time Threshold, Lap Type Count, Brakes
💡Use Setup Sheet for displaying Blanking or Brakes.
Customize a block
Each block has its own editing menu, where you can adjust its appearance and available settings.
To configure a block:
- Select the Edit icon on the block
- Set a background colour. This is optional and available for every block.
💡Use background and border colors to distinguish related blocks and make information easier to identify at a glance.
- Adjust any additional settings available for that block type.
Examples:
- Comment: Define the purpose of the block, such as Engineer Comments or Driver Comments.
- Lap Table: Select which columns to display, such as Sector Times, Fuel Estimation and Sector Speeds.
Available settings depend on the block type.
Arrange your layout
You can resize and reposition blocks to organize the Run Sheet.
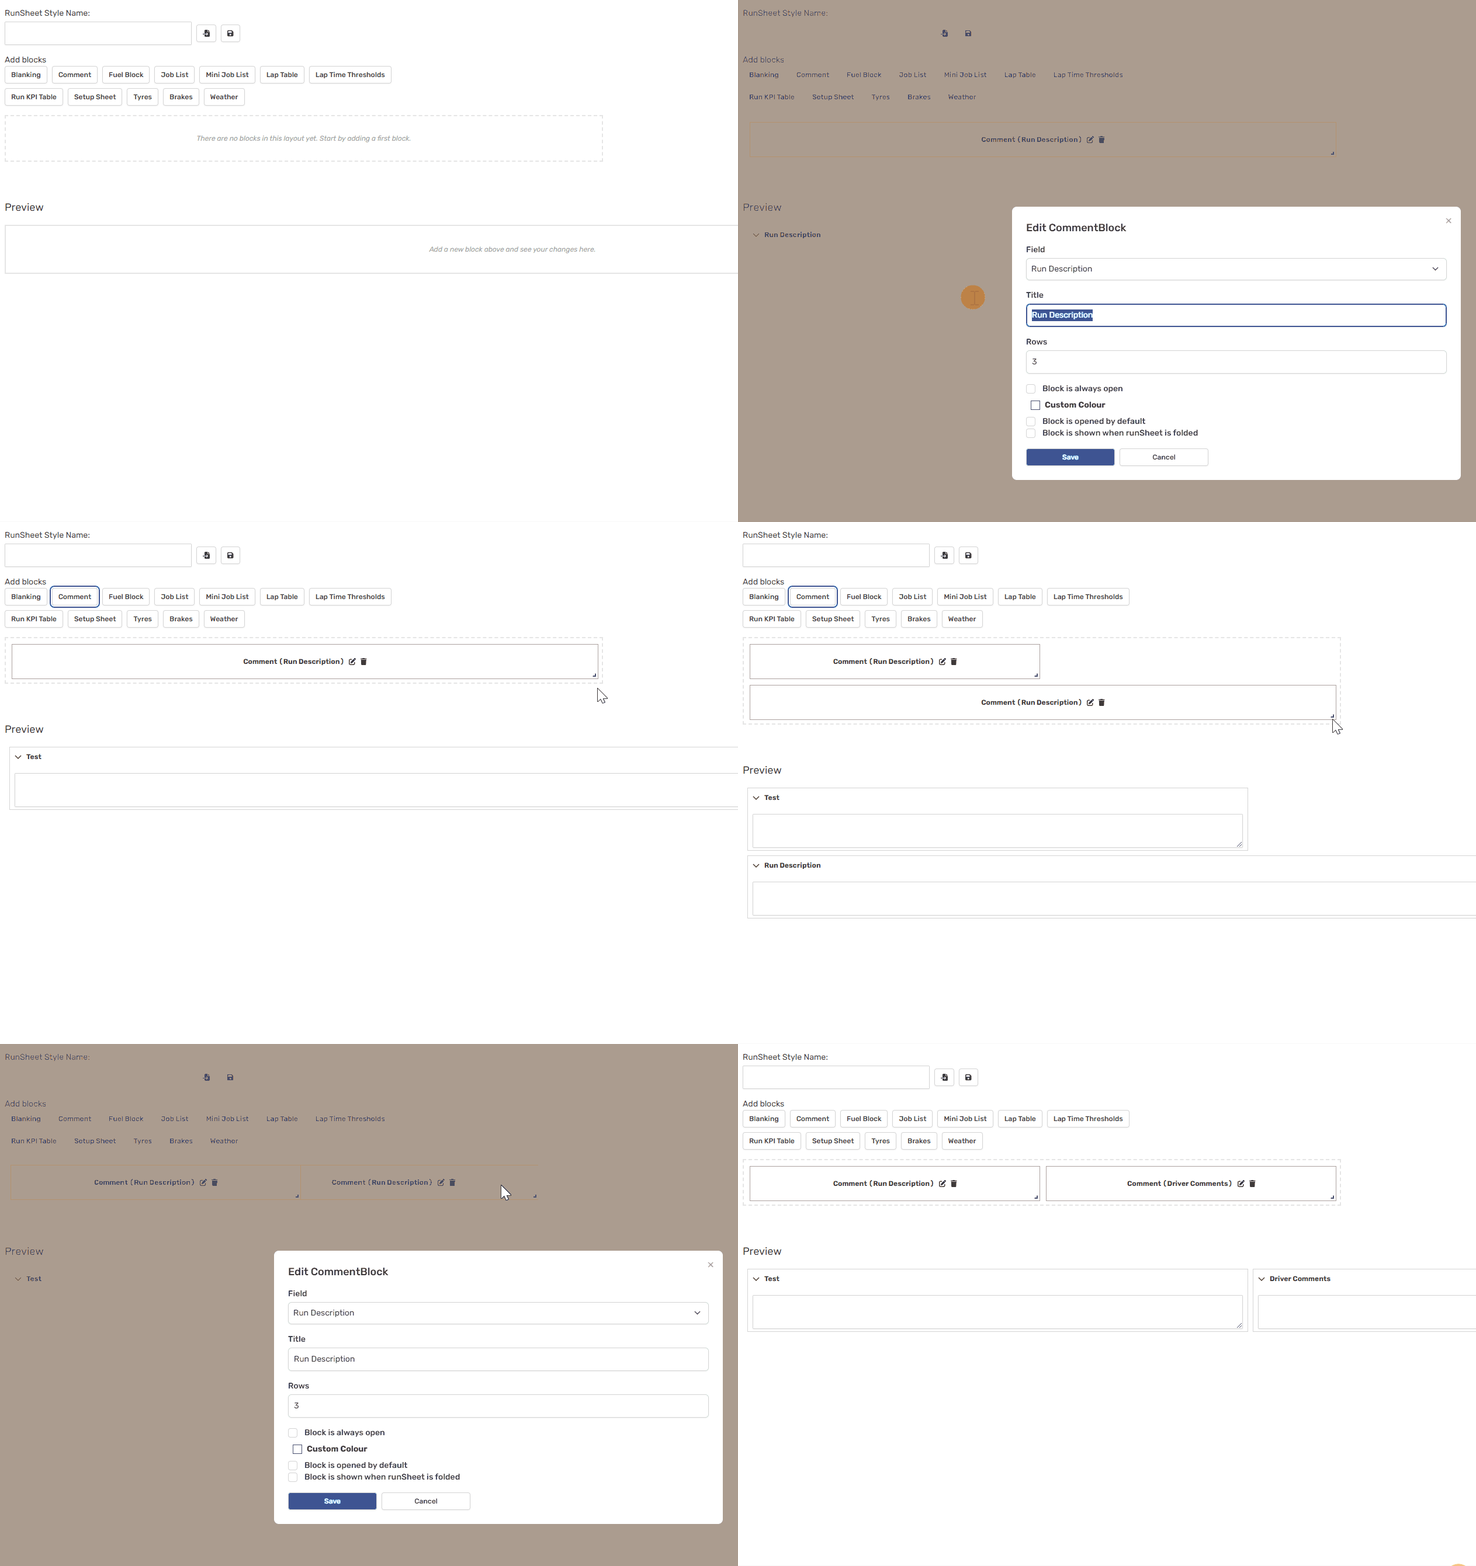
- Resize a block: Select the arrow in the bottom-right corner of the block and drag to adjust its size.
- Move a block: Drag and drop it into your preferred position.
A preview appears below the editing area and updates as you make changes.
💡Position frequently used blocks, such as Lap Table, Comment and Fuel/Energy, where they are easy to access. Place less frequently used reference information further down the layout.
💡You can use the PACETEQ Default Run Sheet Layout as a starting point. To import it, select Import from File next to the layout name field and choose the downloaded file.
Save your layout before leaving the editor. Unsaved changes will be lost if you leave without saving. To discard your changes, select Cancel.
⚠️ Saving a layout does not automatically activate it. You must select it in your profile before it appears on your Run Sheet.
Activate a Run Sheet Layout
To select a layout for your Run Sheet:
-
Select your username at the bottom of the sidebar
-
Open Profile
-
Go to the Run Sheet selection setting
-
Set the "Default Run Sheet Style" to the layout you built
- Save your changes
The selected layout is now used when you open the Run Sheet.
ⓘ You can create and save multiple Run Sheet Layouts for different workflows. Select the layout you want to use through your profile's Run Sheet selection setting.